How I Made a Visual Novel for Android in 2 Days Using React Native

On the weekend, I decided to embark on a new project and bring my idea of a mobile game to life. And most importantly, I chose a visual novel as the genre of the game. In this article, I will share my experience of creating the game over two days, as well as discuss how ChatGPT and Civitai helped me with the script and artwork for the game.
React Native:
When developing a mobile game, I decided to utilize React Native. This choice stemmed from my passion for working with this framework. Despite the availability of numerous alternative technologies, I preferred React Native due to its array of advantages and distinctive features.
React Native enables the creation of cross-platform applications compatible with both iOS and Android. This significantly saves time and resources since the same codebase can be utilized for both platforms.
The core principles of React Native closely resemble those of ReactJS. It is designed for JavaScript and TypeScript development. Getting started with React Native only requires basic knowledge of JavaScript and React.
How I Wrote a Script with ChatGPT:
To craft the script for a visual novel, I engaged with ChatGPT in several stages. Initially, I presented the idea of creating a visual novel and its theme.
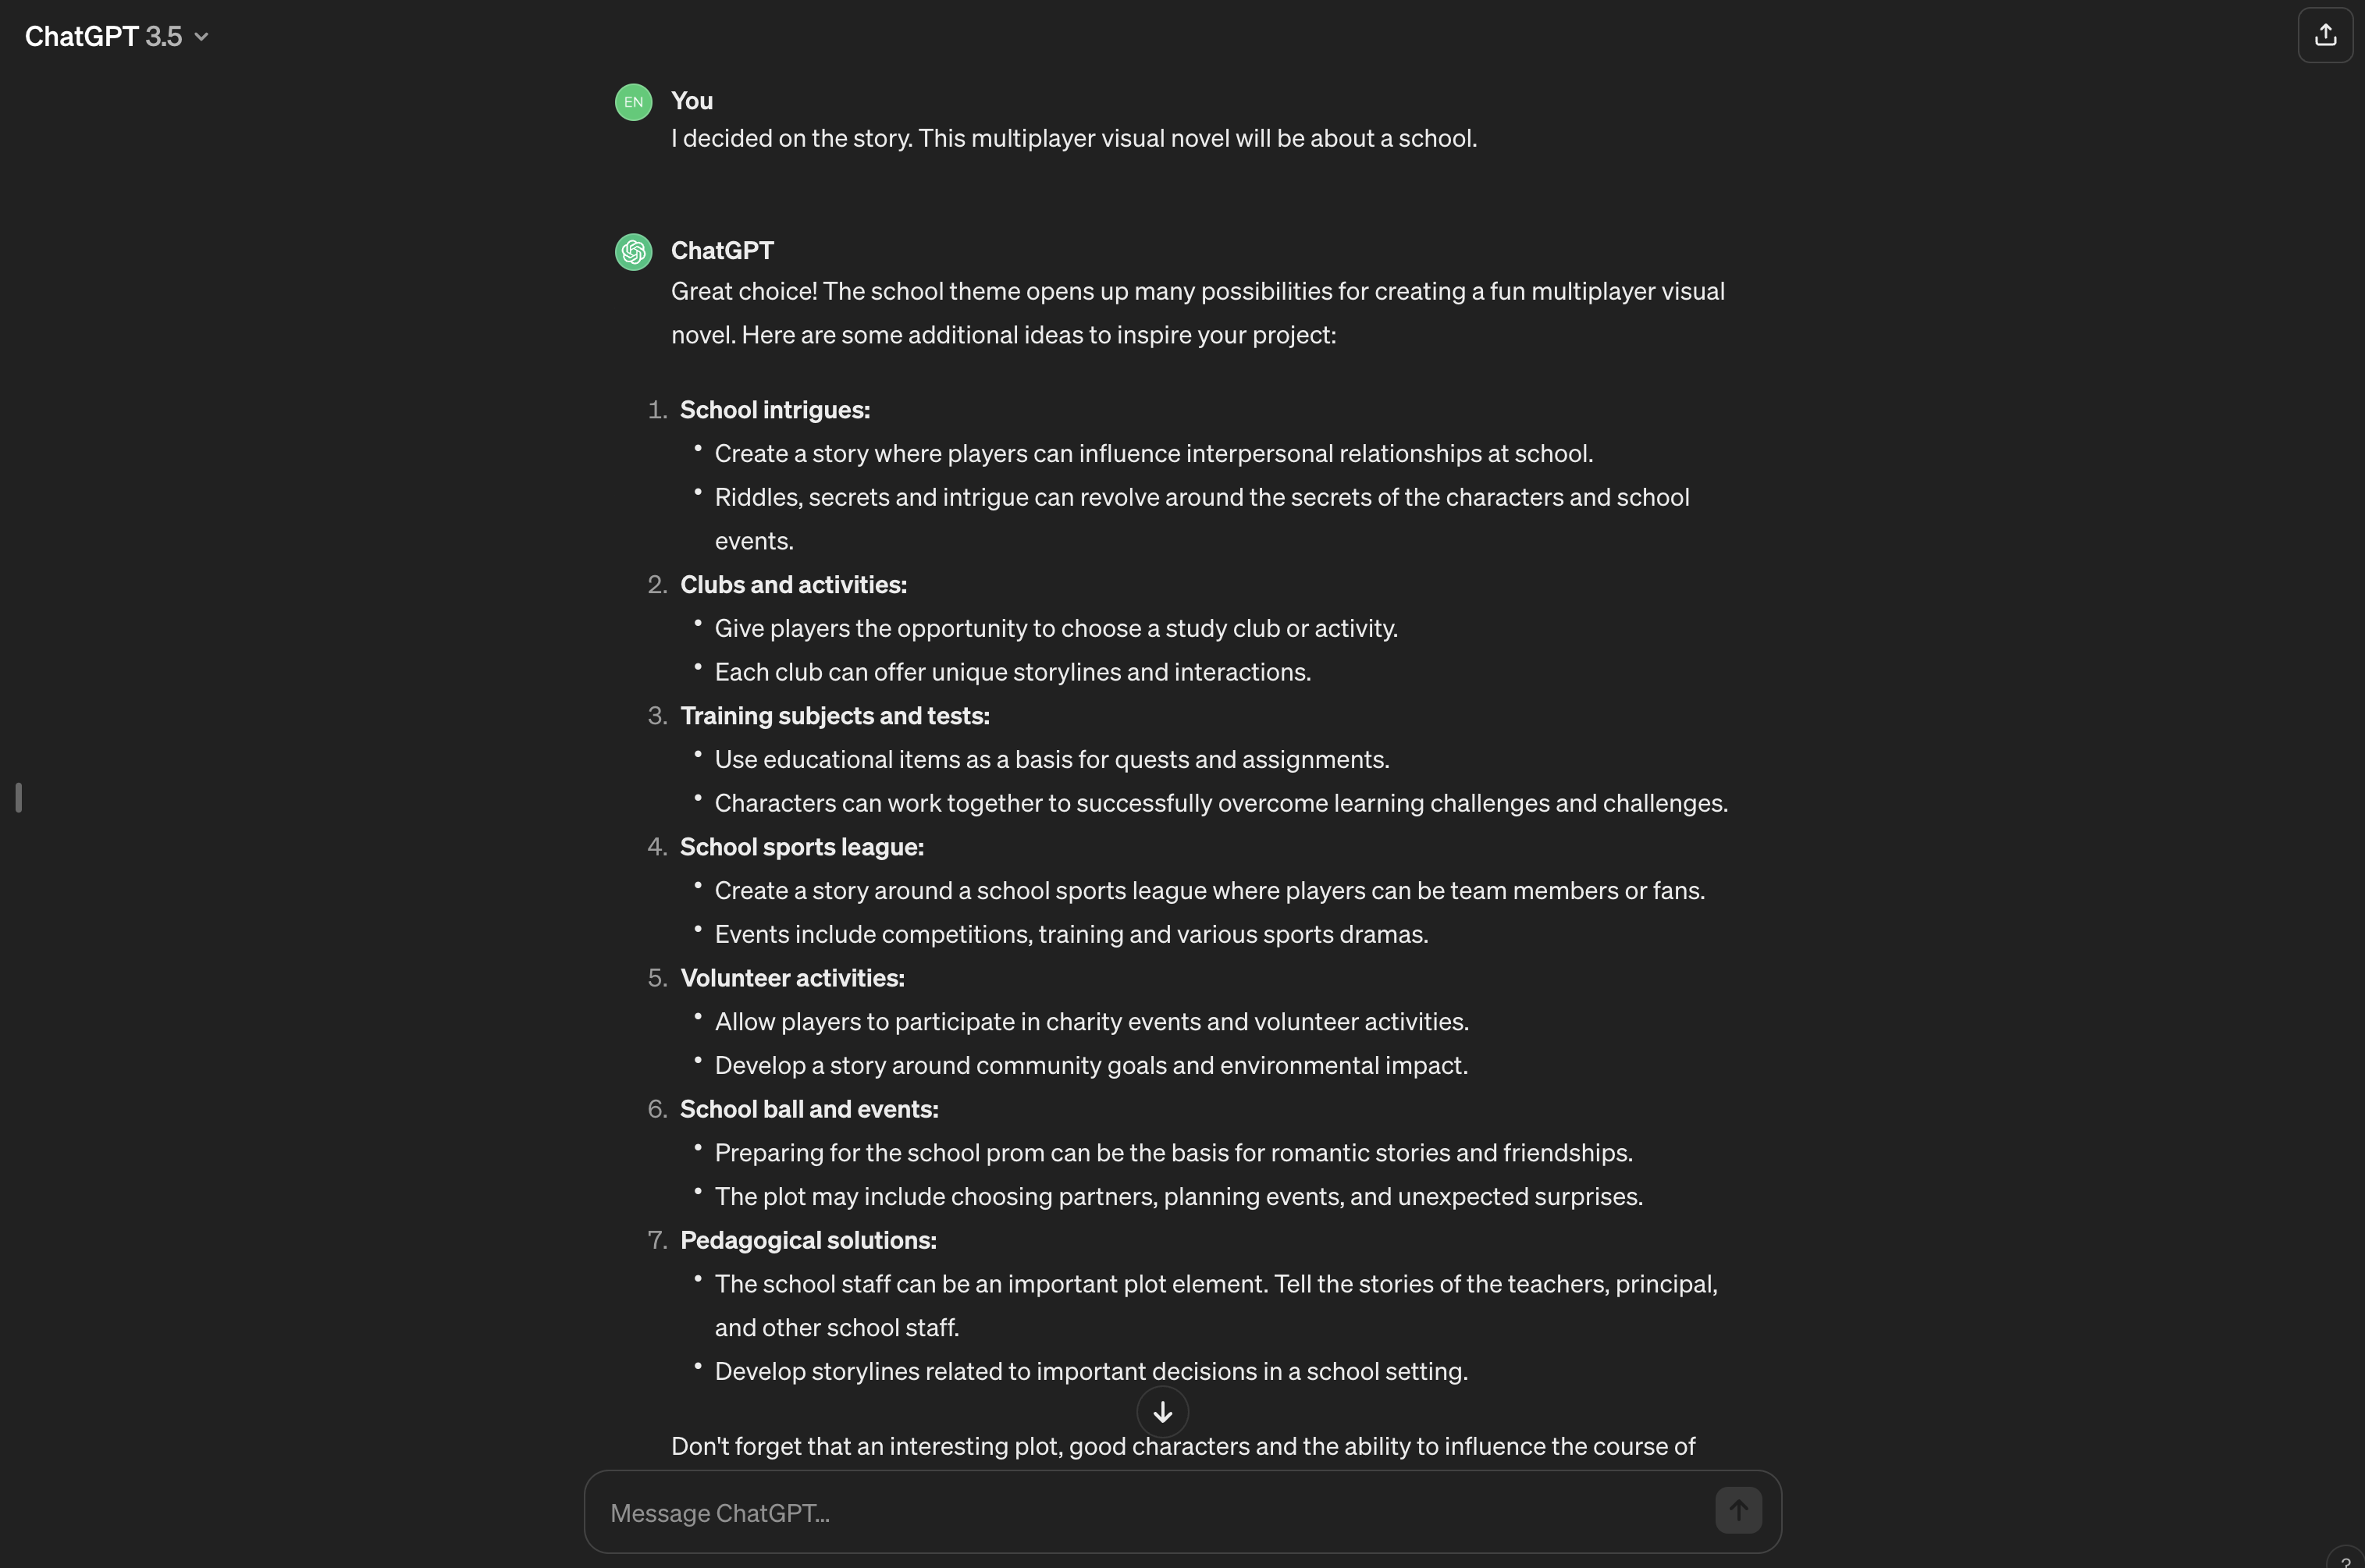
At this stage, ChatGPT provided me with several additional ideas. Next, I began writing various queries related to the game's theme, attempting to obtain an approximate plan for the game's script. And I succeeded.
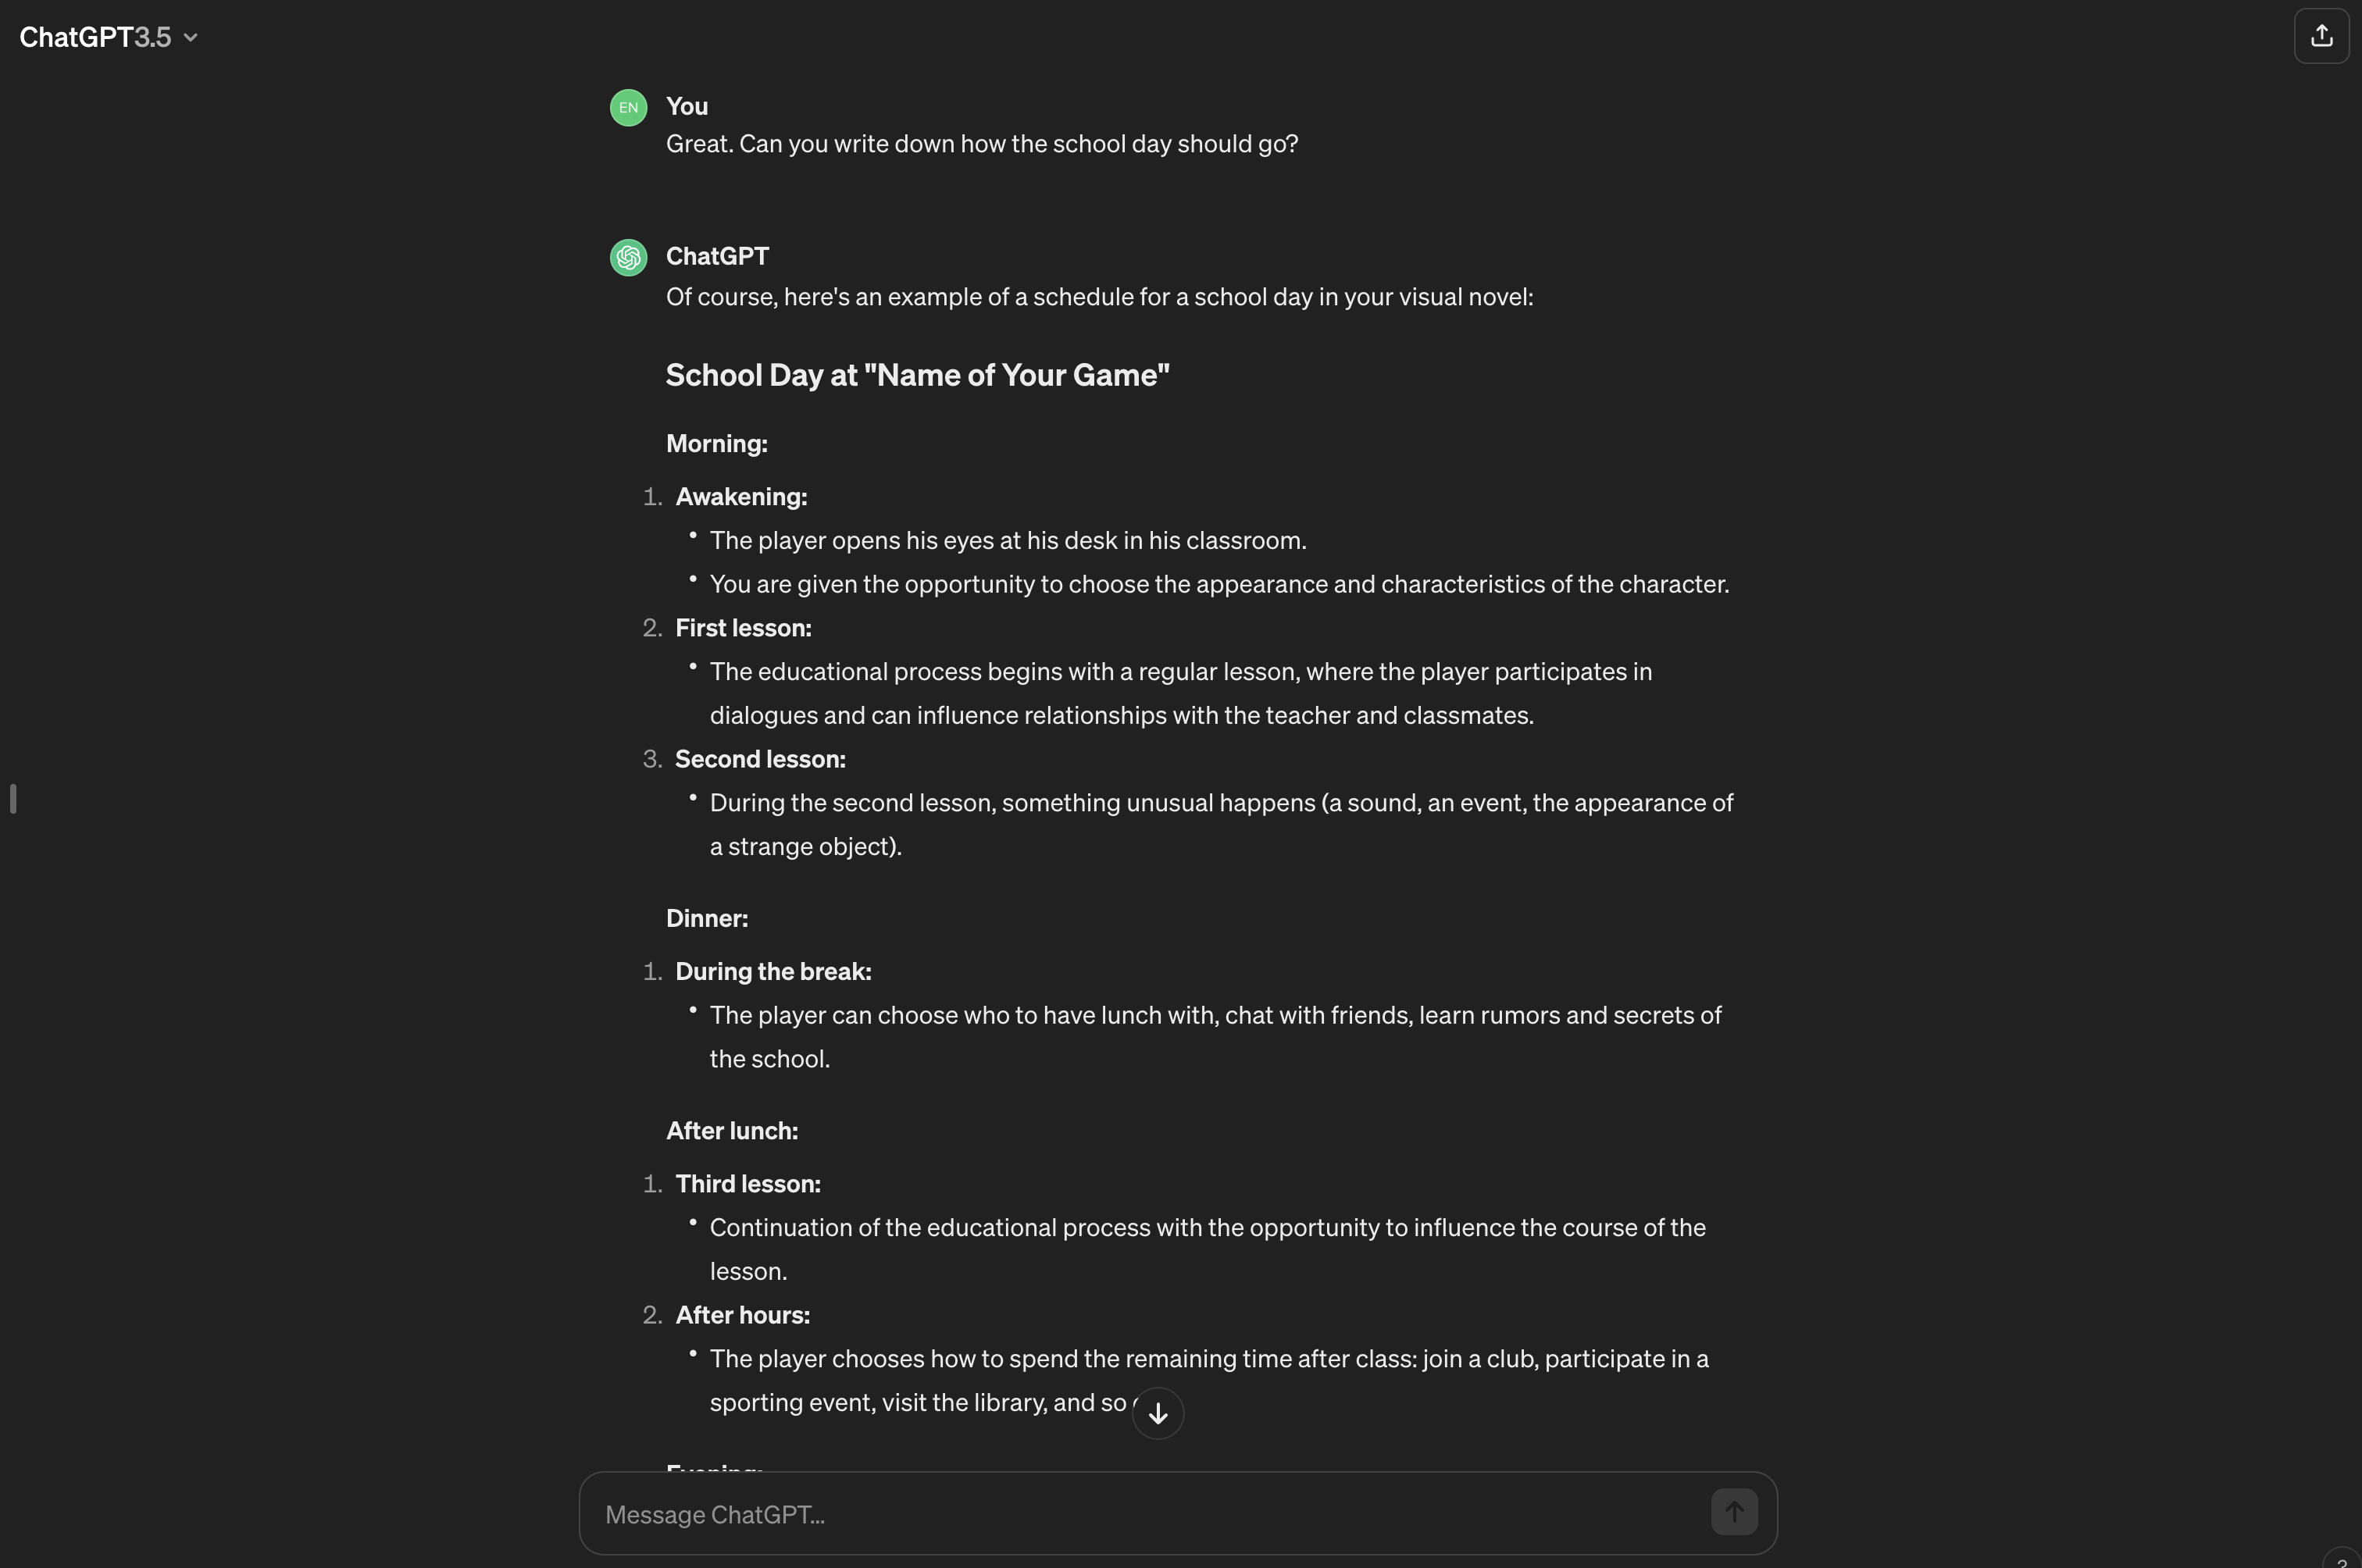
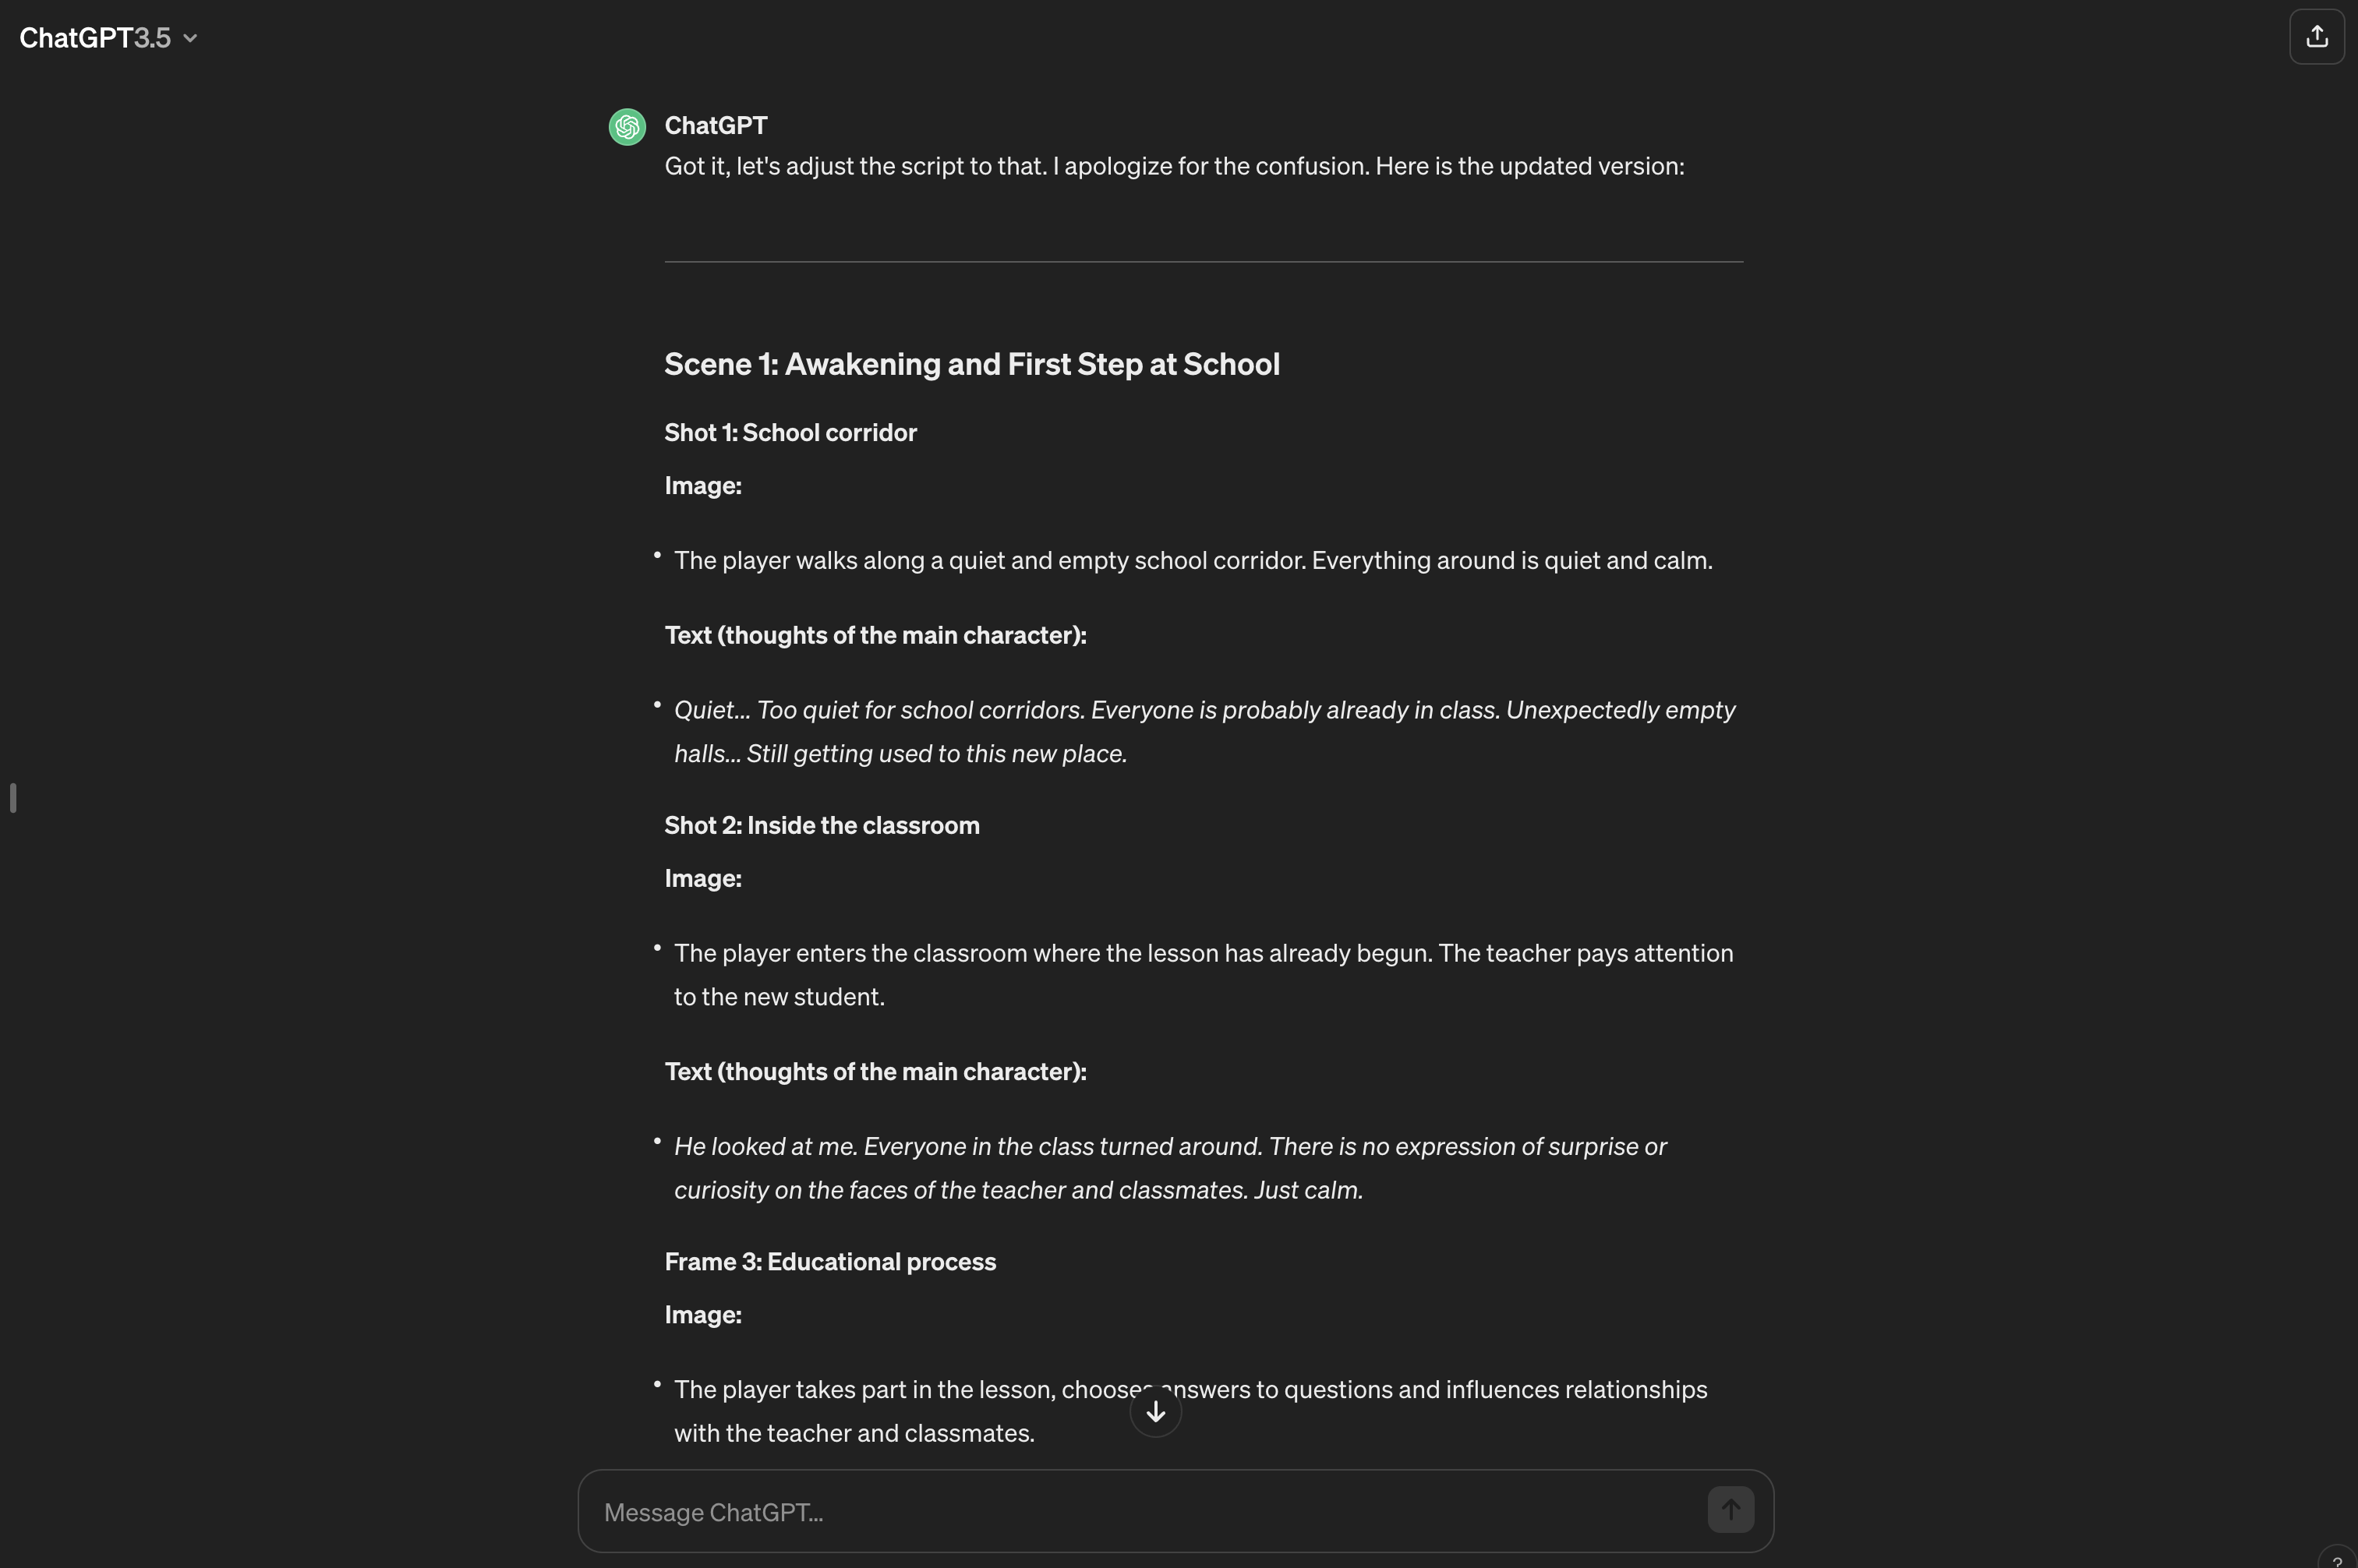
ChatGPT outlined a plan that was similar to what I needed. Each stage of the plan resembled individual scenes in the game. However, I still needed to refine these scenes. I briefly described each scene to ChatGPT. I received a response broken down into frames and dialogues. If something didn't satisfy me, I asked ChatGPT to correct it, specifying exactly what was wrong and how it should be. It didn't work on the first try, but after some repetition, I managed to create a fairly decent script.
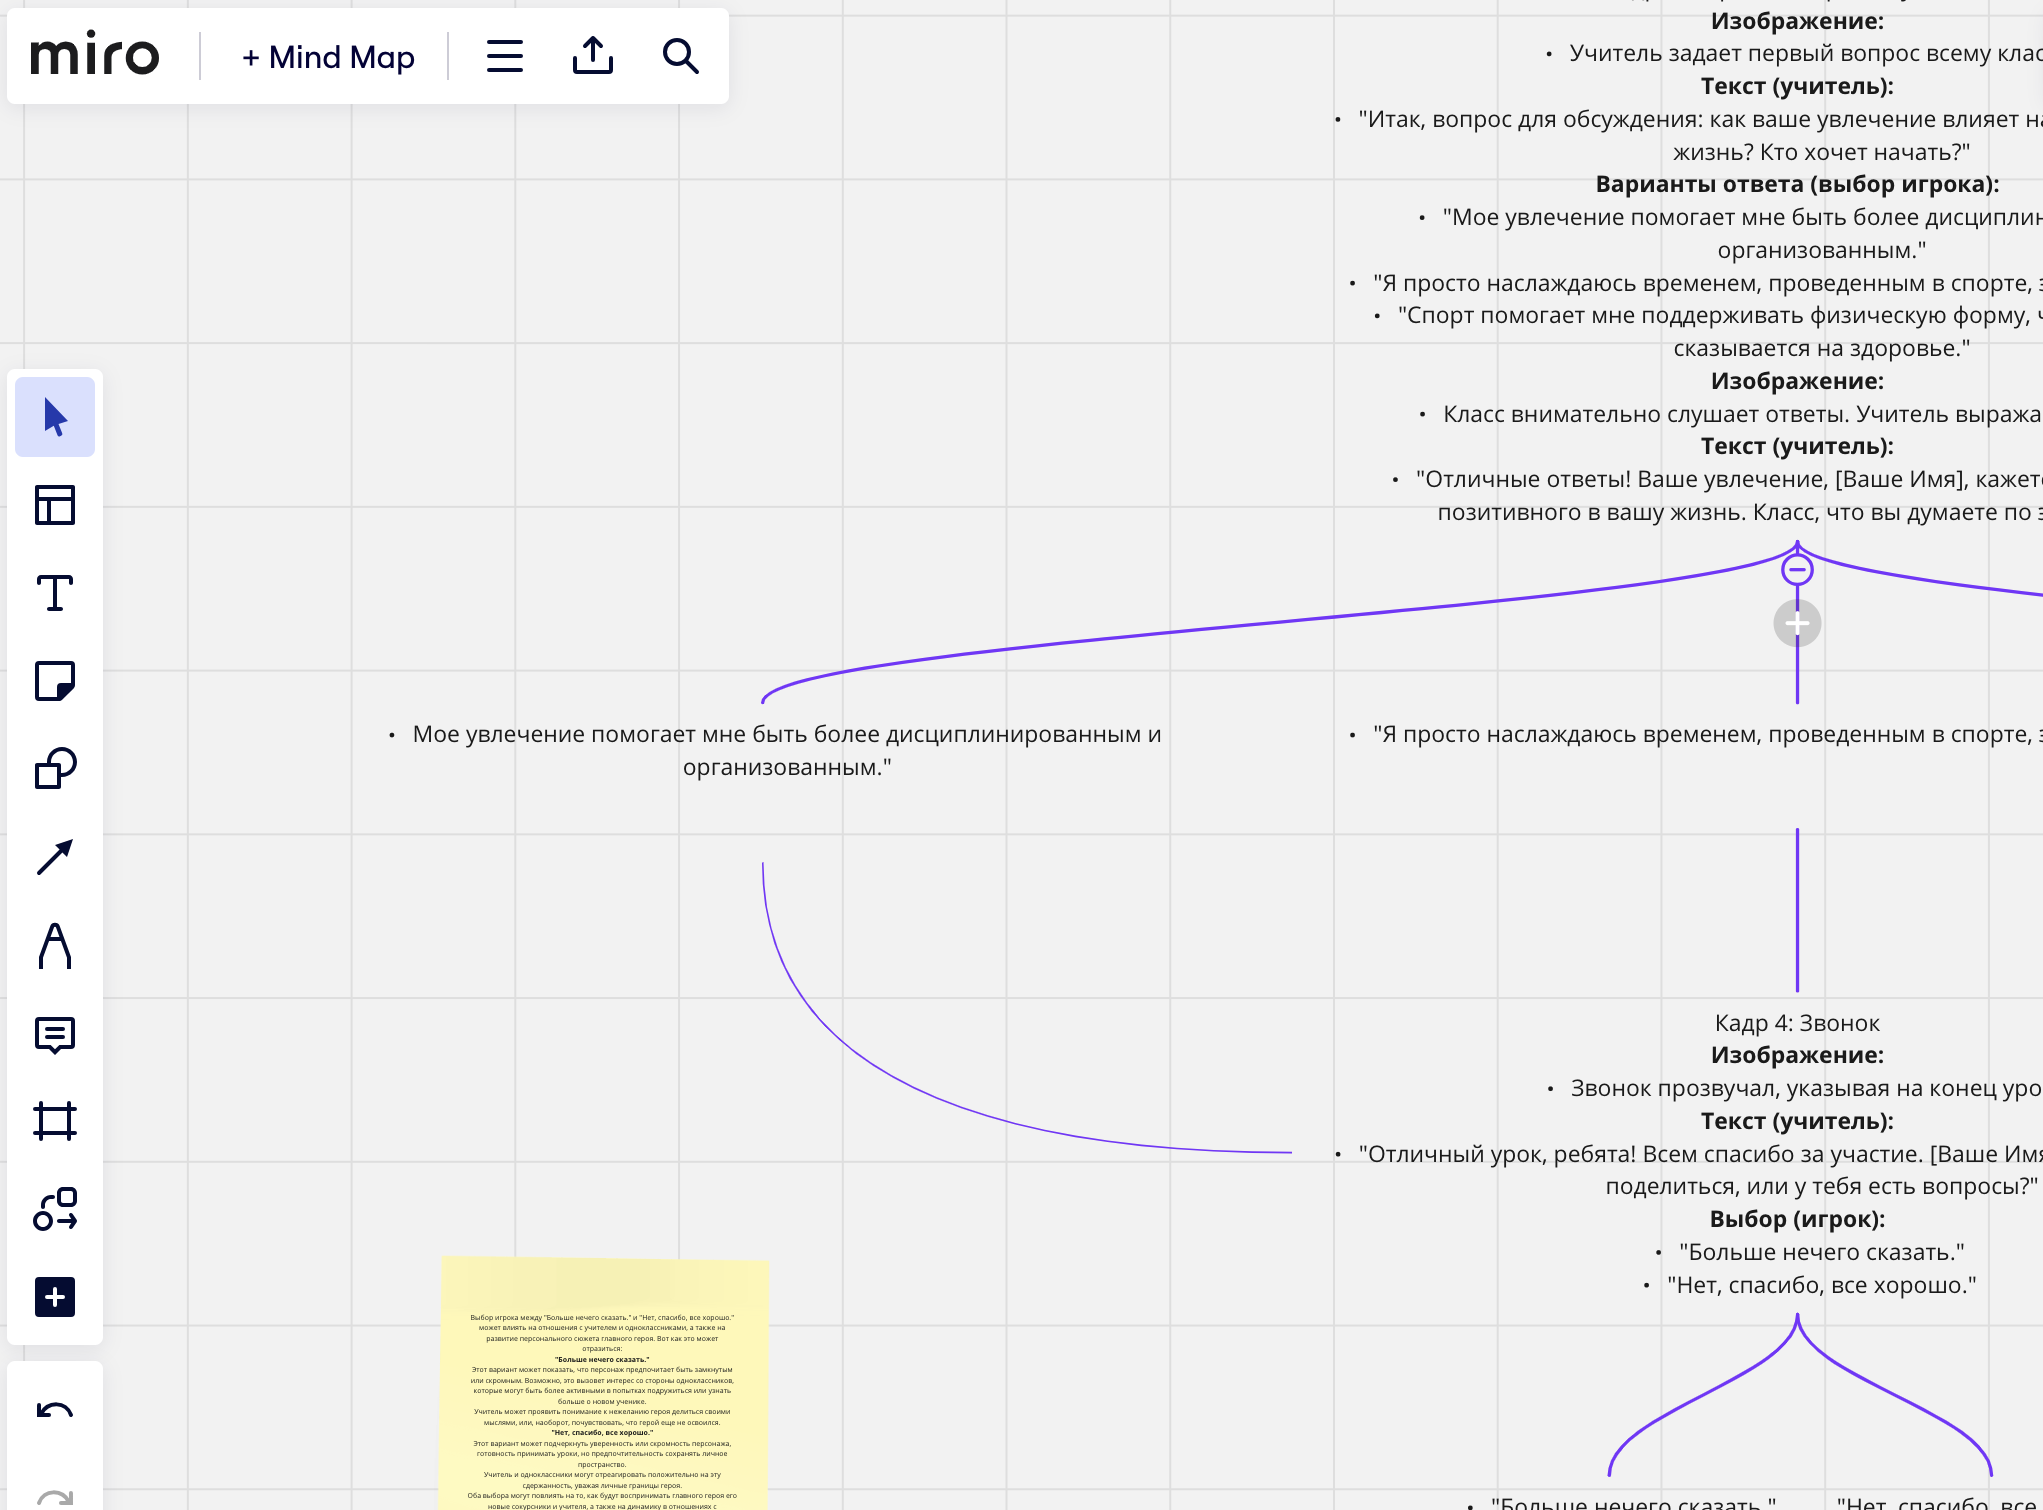
At a certain point, the script branched, making it difficult to work with, so I had to transfer the finished scenes and frames to Miro. There, I created a diagram to visualize the plot branches and the sequence of scenes.
Generating Images for the Game using Neural Networks:
There are numerous services for generating images using neural networks. Many of them are actively advertised and presented as something cool. Typically, they have a web interface, allowing you to create images directly in your browser without installing or configuring anything. However, after trying some of them, I was disappointed. The images were not suitable for use in the game. No matter how I composed the query for generation, I couldn't find anything suitable for a mobile visual novel set in a school.
Skipping the argumentation, I'll simply advise you to use Stable Diffusion or NovelAI. That's all you need.
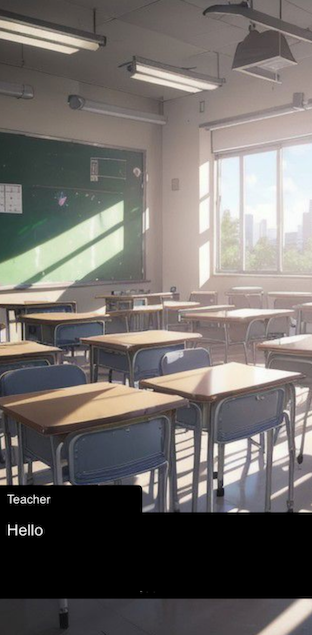
Due to time constraints and limited resources for exploring the topic, I used the website Civitai. Taking one of the ready-made user models, I generated some art for myself, for free, without SMS, and right in the browser. I just had to register. Here's one of the images I obtained after generating it.

Writing Code for a Visual Novel in React Native:
As always, ensure that Node.js is installed. If not, install it using:
brew install node
Install Android Studio and the Android SDK from here.
Set the environment variable ANDROID_HOME.
For iOS development, you'll need to install Xcode.
However, in this article, we'll skip the details of setting up the development environment. You can find a comprehensive guide on the React Native website. Let's start this article by creating and launching the project using React Native CLI.
Create the project using the template:
npx react-native@latest init AwesomeProject
Launch it:
npx react-native start
Let's start writing the code for the visual novel. Create a component called BaseScene that will handle the logic for displaying scenes in the game. A scene will be considered a specific location where the action takes place in the visual novel.
interface SceneProps {
  backgroundImage: ImageProps['source'];
}

const BaseScene: React.FC<SceneProps> = ({
  backgroundImage
}) => (
  <View>
    <Image
      source={backgroundImage}
      style={{width, height: '100%', resizeMode: 'cover'}}
    />
  </View>
);
We'll wrap the entire scene in a Pressable component so that tapping on the screen triggers the opening of the next frame of the game, dialogue, or the next scene.
interface SceneProps {
  backgroundImage: ImageProps['source'];
  onPress?(): void;
}

const BaseScene: React.FC<SceneProps> = ({
  backgroundImage,
  onPress
}) => (
  <View>
    <Pressable onPress={onPress} style={{flex: 1}}>
      <Image
        source={backgroundImage}
        style={{width, height: '100%', resizeMode: 'cover'}}
      />
    </Pressable>
  </View>
);
Let's add the display of text and the author of the text.
interface SceneProps {
  backgroundImage: ImageProps['source'];
  onPress?(): void;
  text?: string;
  textAuthor?: string;
}

const BaseScene: React.FC<SceneProps> = ({
  backgroundImage,
  onPress,
  text,
  textAuthor
}) => (
  <View
    style={{
      position: 'relative',
      flex: 1,
    }}>
    <Pressable onPress={onPress} style={{flex: 1}}>
      <Image
        source={backgroundImage}
        style={{width, height: '100%', resizeMode: 'cover'}}
      />
      {text && (
        <View
          style={{
            position: 'absolute',
            bottom: 50,
            backgroundColor: 'black',
            padding: 8,
            width: '100%',
          }}>
          {textAuthor && (
            <View
              style={{
                position: 'absolute',
                backgroundColor: 'black',
                top: -36,
                height: 36,
                padding: 8,
                borderTopRightRadius: 6,
              }}>
              <Text style={{color: 'white', fontSize: 16}}>{textAuthor}</Text>
            </View>
          )}
          <Text style={{color: 'white', fontSize: 20}}>{text}</Text>
        </View>
      )}
    </Pressable>
  </View>
);
Next, let's describe one of the game scenes together.
This will be Scene1, or the scene in the school corridor.
We'll use the BaseScene component described above. We'll pass it the image of the school corridor.
const Scene1 = () => {

  return (
    <BaseScene
      backgroundImage={require('../assets/hallway.jpeg')}
    />
  );
}
Let's add content to the scene. We'll pass text and an image of the teacher, who will speak this text, to BaseScene. We'll add the image as children to BaseScene.
const Scene1 = () => {
  const image = (
    <Image
      source={require('../assets/teacher.png')}
      containerStyle={{
        position: 'absolute',
        bottom: 70,
      }}
    />
  );
  const text = 'Hello';
  const textAuthor = 'Teacher';

  return (
    <BaseScene
      backgroundImage={require('../assets/hallway.jpeg')}
      text={text}
      textAuthor={textAuthor}
    >
      {image}
    </BaseScrene>
  );
}
In the scene, there's more than one dialogue and character involved.
Let's add an object called steps, which will store the steps - dialogues for this scene. We'll move the image and text into the fields of this object. Also, we'll add one more dialogue to the scene.
enum Step {
  first = 'first',
  second = 'second'
}

const steps = {
  [Step.first]: {
    text: 'Class, we have a new student. Come on, introduce yourself, please',
    textAuthor: 'Teacher',
    children: (
      <Image
        source={require('../assets/teacher.png')}
        containerStyle={{
          position: 'absolute',
          bottom: 70,
        }}
      />
    ),
  },
  [Step.second]: {
    text: 'Hello everyone, I'm {{name}}',
    textAuthor: 'Hero',
    children: (
      <Image
        source={require('../assets/teacher.png')}
        containerStyle={{
          position: 'absolute',
          bottom: 70,
        }}
      />
    ),
  },
};
Let's add the useState state. It will store the current dialogue id, and we'll add transitions between dialogues in the scene. The trigger for the transition will be a press on the screen.
const Scene1 = () => {
  const [stepID, setStepID] = useState(Step.first);
  const steps = {
    [Step.first]: {
      ...
      onPress: () => {
        setStepID(Step.second);
      },
    },
    ...
  };

  const currentStep = steps[stepID];

  return (
    <BaseScene
      backgroundImage={require('../assets/hallway.jpeg')}
      {...currentStep}
    />
  );
}
Some steps may contain questions for the player. Let's add the ability for the player to enter their name. To do this, we'll add Step.third, in which there will be a modal window with an Input component for entering the player's name.
...
const [name, setName] = useState('Hero');
...
const steps = {
  ...
  [Step.third]: {
    text: 'Enter your name...',
    textAuthor: 'System',
    children: (
      <Modal animationType="slide" transparent={true} visible>
        <View
          style={{
            ...
          }}>
          <View
            style={{
              ...
            }}>
            <Text style={{color: 'white', fontSize: 16}}>
              {t('screen2.createName.title')}
            </Text>
            <TextInput
              style={{
                ...
              }}
              placeholderTextColor="gray"
              placeholder="Hero"
              onChangeText={text => setName(text)}
            />
            <Pressable
              style={{
                ...
              }}
              onPress={() => {
                setStepId(...);
            }}>
              <Text
                style={{
                  ...
                }}
              >Save</Text>
            </Pressable>
          </View>
        </View>
      </Modal>
    )
  }
}
Great, but what if the user closes the game? We need to save the game state so that we can continue from the last save. To do this, let's add AsyncStorage and save the current scene step ID, scene number, and user input (currently just the player's name) to it.
import AsyncStorage from '@react-native-async-storage/async-storage';

...
const saveStepID = (newStepID: Step) => {
  const storeData = async (value: string) => {
    try {
      await AsyncStorage.setItem('stepID', value);
      setStepID(value);
    } catch (e) {
      ...
    }
  };

  storeData(newScreen);
};
...
Next, we need to retrieve the saved data upon reopening the application. Let's add useEffect to the App component.
useEffect(() => {
  const getData = async (itemName: string, setFunction: Function) => {
    try {
      const value = await AsyncStorage.getItem(itemName);
      if (value !== null) {
        setFunction(value as any);
      }
    } catch (e) {
      // error reading value
    }
  };

  getData('stepID', setStepID);
  getData('sceneID', setSceneID);
  ...
}, []);
Let's add music to the game. We'll use the react-native-sound package.
useEffect(() => {
    Sound.setCategory('Playback');

    const music = new Sound('school.mp3', Sound.MAIN_BUNDLE, error => {
      if (error) {
        console.log('failed to load the sound', error);
        return;
      }

      musicLoadedRef.current = true;
      music.setVolume(0.5);

      const playMusic = () => {
        music.play(playMusic);
      };

      playMusic();
    });

    return () => {
      music.reset();
      music.stop();
    };
  }, []);
The music should stop playing when the application is in a background or inactive state. To achieve this, let's subscribe to changes in the application state and pause and resume the music accordingly.
import { AppState, ... } from 'react-native';

...
const appState = useRef(AppState.currentState);

useEffect(() => {
  ...
  const subscription = AppState.addEventListener('change', nextAppState => {
    if (appState.current === 'active' && nextAppState !== 'active') {
      music.stop();
    } else if (
      appState.current !== 'active' &&
      nextAppState === 'active' &&
      musicLoadedRef.current
    ) {
      const playMusic = () => {
        music.play(playMusic);
      };

      playMusic();
    }

    appState.current = nextAppState;
  });
  ...
}, [])
...
Next, I added localization to other languages using react-i18next. I added more scenes, steps within scenes with choices for different plot developments. I implemented animated transitions between scenes and steps within scenes using Animated. I added sound effects for footsteps, door knocks for a deeper immersion into the game. I included an introductory and ending screen in the game and provided an option to rate the game on Google Play.
If you are interested in a more detailed description of how I did it, please write to me on my social networks. Then I will publish a more detailed description of the game creation process.
Finding Music for the Game:
I created the main musical theme of the game using the GarageBand application.
Sounds of door openings, footsteps, door knocks, and school ambiance were found on the freesound website. The key when searching for music and sounds is to pay attention to the type of license, ensuring it allows for use in your project. For example, the Creative Commons Zero (CC0) license permits the use of material in the public domain without restrictions.
About the Game:
The game is available for download on Google Play via this link. It is a visual novel game titled "One Step in high School". In it, we embark on our journey as a student recently transferred to a new school. We will get to know our teacher and classmates, go to the school cafeteria with them, and have a good time. This game features music and sound effects for key actions, such as footsteps in the hallway or knocking on the door, for a deeper immersion into the game. The entire game script was written using neural networks. Give it a try and share your feedback on this game.